General
Workflows can be used to automatize several actions in modules. Workflows are triggered by changes made in the target module’s fields – e.g. when a potential’s stage is changed to ‘won’ or when a customer’s assigned user has been changed. When triggered, the workflow can for instance send email, create an activity, run a wanted module tool, or possibly invoke a custom function.
Managing Workflows
You can add, edit and delete workflows in Settings → Workflows. These settings can also be accessed through module’s own settings.

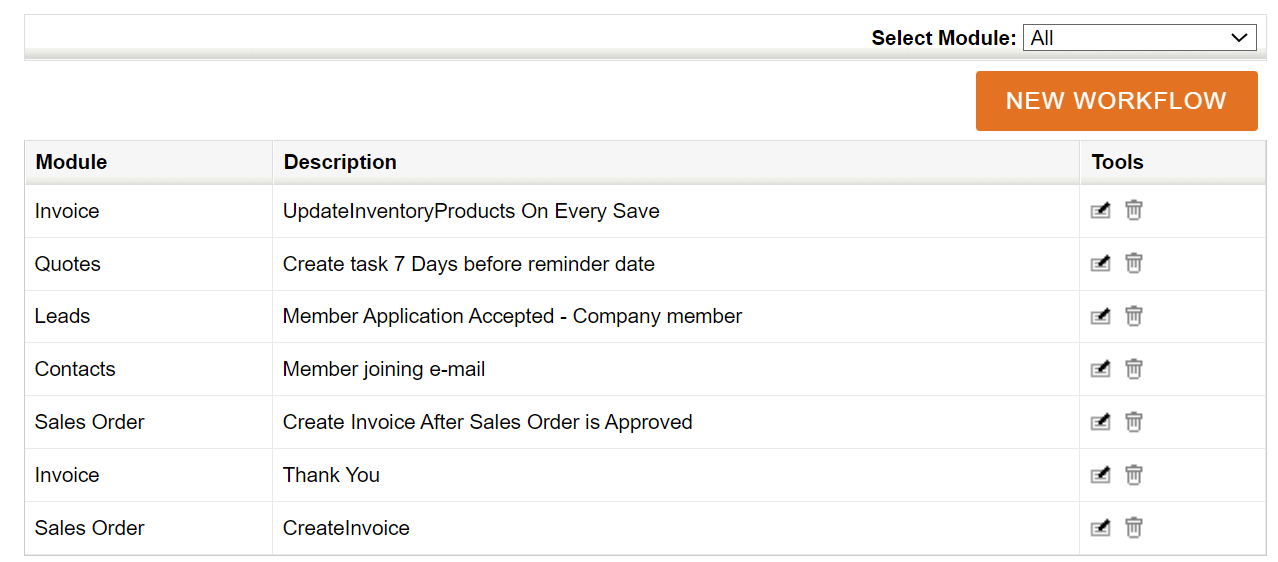
In the main view you can see all the workflows in all the modules (see the picture below). The workflows can be filtered by module by selecting a module on the picklist on the top right corner. The existing workflows can be edited and deleted with the buttons in the Tools column and create a new one by clicking the New Workflow button.
When creating a new workflow you’ll need to first select the module where it is created. You can also use a template, if an earlier workflow has been saved as a template (in edit view, there is a Save as Template button for this). In the next view (see the picture below) the name and the time the workflow task is run are determined. The options for the time the task is run are the following:
- Only on first save – The task is run when the entity is created and only once.
- The first time all the conditions are met – The task is run only once when all the conditions are met (if the same entity meets the conditions again later, the task will not be run).
- Every time the record is saved – The task is run on every save while all the conditions are met.

Next, you can determine conditions for when the workflow is run. A new condition is created by clicking the New Condition button and then you can determine a field (either from the module the workflow is in or from a module linked to it), an operator and a value for it (see the picture below). An unnecessary condition can be deleted later with the delete button ![]() on the end of the row. The relation between the conditions is always AND. This means that all the conditions need to be met for the workflow to take action.
on the end of the row. The relation between the conditions is always AND. This means that all the conditions need to be met for the workflow to take action.

It is also possible to make a condition that tracks the changes in a certain field. This is done by writing the value in a form #OLD.fieldname – for example, if the billing street has changed: Billing street is not #OLD.bill_street. Comparing the value to the old one is always field-specific. With picklist, multipicklist or checkbox type fields, you can enter the old value by clicking the button ![]() next to the condition row, which will then transform the value selection into a text field.
next to the condition row, which will then transform the value selection into a text field.
When the conditions are ready, the workflow must be saved with the Save button in the top right corner. The view then updates and a new section Tasks appears below the conditions. In this section, the functions of the workflow are determined. A new function is created by clicking the New Task button and selecting a function type. A workflow can have multiple functions. All of these functions do not necessarily need to be active at the same time, but the status of the function determines whether the function is run with the workflow or not.
The function type options are the following:
Invoke Custom Function
This function executes a customer and module-specific method created by the system provider. The function is selected in the Method name picklist. In most cases this picklist is empty and instead the text “No method is available for this module” is shown.
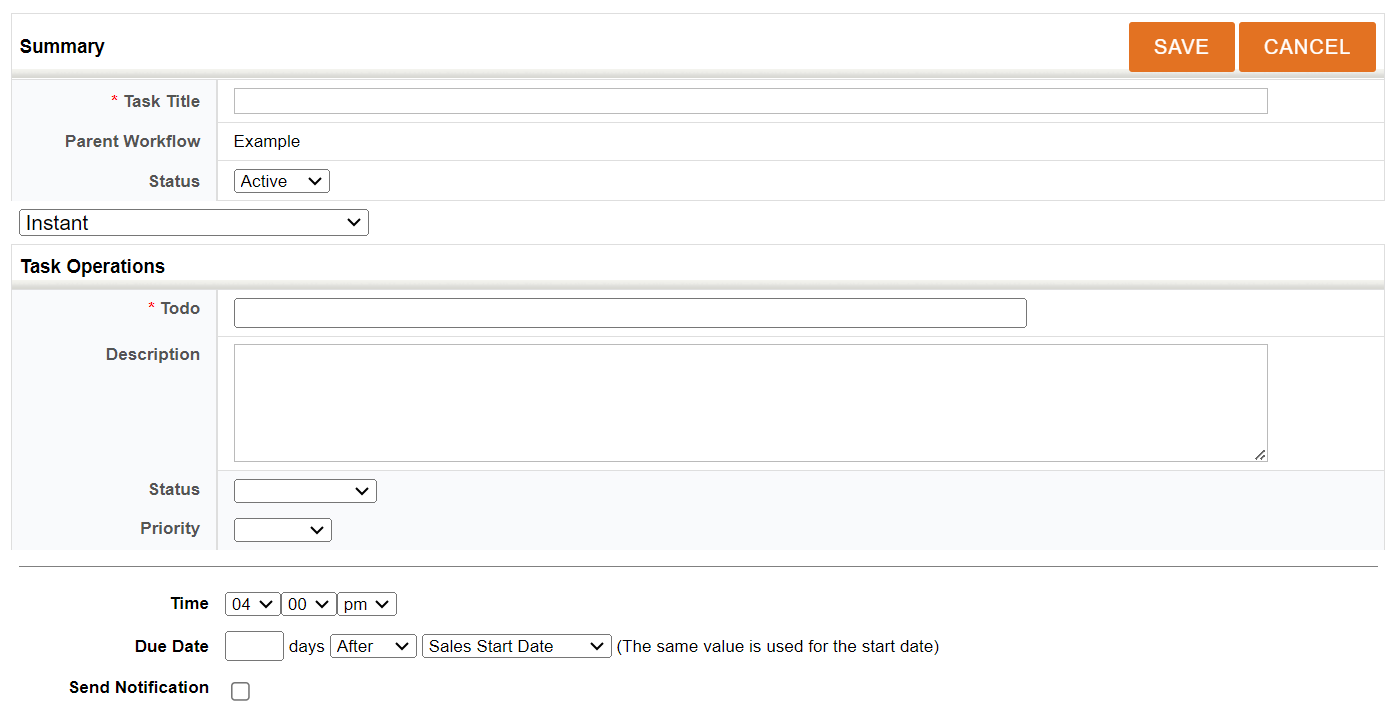
Create Todo / Create Event
These functions create an activity. The determined fields vary a little by the activity – both todos and events require a task title and status in the summary section and a name, description and status. An event requires in addition an event type, start and end dates and times (see the picture below), whereas a todo needs a priority, due date and you can also choose to set notification sending on.
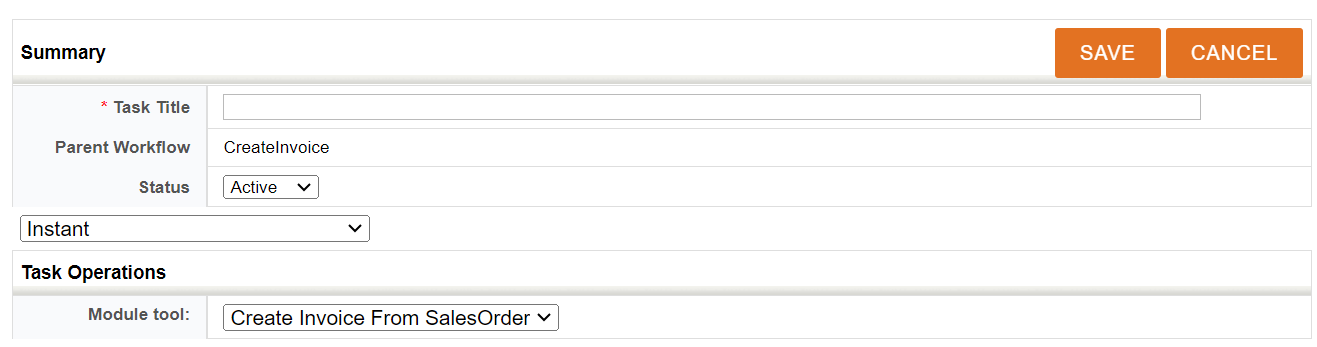
Run module tool
This function runs the selected module tool (see the picture below), when the conditions of the workflow are met. This functionality is meant to be used for doing and running tasks meant to be executed purely in the background.
Please note that only some of the module tools are available here. So all module tool types do not work with Run module tool workflow, and thus the user will not be able to select them. Types of module tools that can be selected using Run module tool workflow are:
- Create entity
- Notify user
- Run HTTPS request
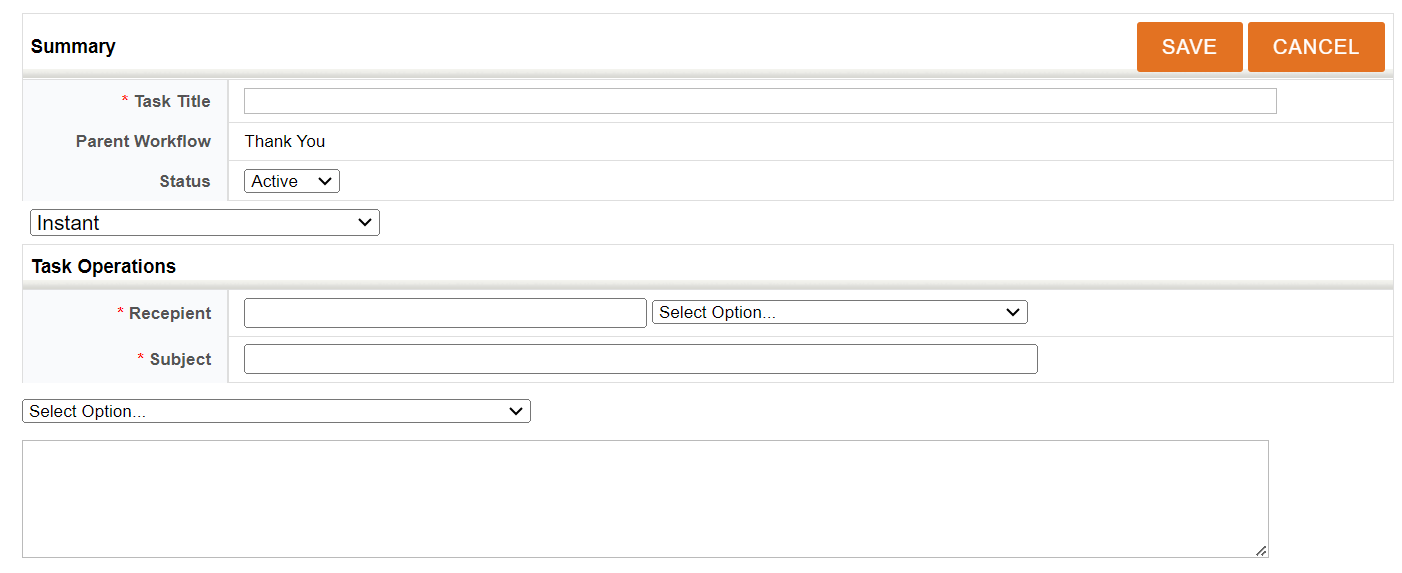
Send email
This function creates a new email to the target group defined in the recipient field. In the recipient and body fields it is possible to use tags, which can be added from the picklists next to/above these fields (see the picture below).
Workflow timing
The system offers three types of workflow timing: Instant, Execute the task after some delay, and Execute in background. From these options, the Instant is the most straightforward option, and it means that the workflow is executed as soon as its requirements are met.
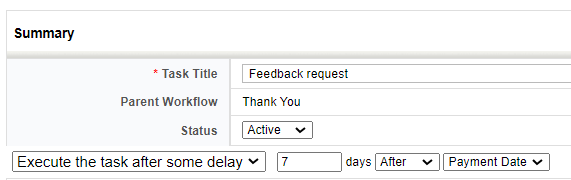
Execute the task after some delay
The delay for these tasks is measured in days, with a minimum of one (1) day. This option gives the user the option to set the run of the function to happen after a certain time. The delay is always in days, but you can determine the number of days and from which time stamp of the workflow it is calculated. Note, that along with this function, the condition #CURRENT_USER reacts as an admin user.
For instance, if we wish to request customer feedback a week after they have made the payment, we should use the following settings:
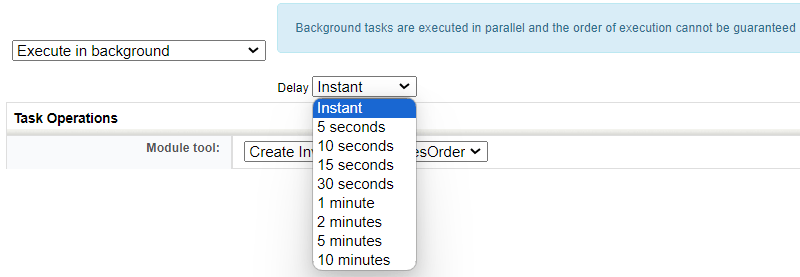
Execute in background
Background workflows are intended for time-consuming tasks, such as REST HTTPS requests. They can also be used for tasks that require a specific delay. Examples of these situations are when an invoice is created from a sales order at the same time the sales order is created or a new invoice with rows is created by changing invoice status/type. The delay for these tasks ranges from instant to 10 minutes (picture below).
When calculating the needed delay, there is a need to take a few things into account. So, for example, if the system already has large amounts of processes like workflows going on, or the users internet speed is slow, there might be a need for a bigger delay. While most of the workflows can be performed with a five-second delay, if you are uncertain set it up to be as high as ten minutes if necessary.
Workflow Template
If you want to create a similar workflow that you already have, you can save the existing one as a template and use it for the new one. Saving as a template is done by entering the edit mode of the existing workflow, clicking the Save as Template button and determining a name for the template. After this the template can be used when creating a new workflow. Note, that the template can be used only in the same module that the original workflow was in. Therefore it is not possible this way to copy a workflow from one module to another.
Workflow differences in Legacy vs V2 versions
Most of the workflows are usable as they are in both the older version of the system (Legacy) and the newer version of the system (V2). However, there are also a few exceptions.
- Condition .OLD does not work in V2.
- V2 has automatically updating email campaign features not available in Legacy.
- V2 has automations that can be used for managing portal users.