WordPress Plug-in – Configuration and Use
Introduction
CRM-service offers a free-to-use WordPress plug-in, or connector, with which the information received through WordPress site forms can be automatically saved in the CRM as well. You can use the forms to create new leads or potentials, which can be used instantly in your sales, support or marketing pipelines.
The connector can be used together with the following WordPress forms:
- WP Libre Form
- Gravity Forms
- Contact Form 7.
Please note, that only the following form field types are supported by the connector:
- text
- picklist
- checkbox
- date.
Installing the Plug-in
You can download the WordPress plug-in here.
Note, that only the WordPress site provider can activate the plug-in. So if the site is managed and maintained by a third party, you must ask them to install the plug-in.
Configuring the Connector
Once the plug-in has been activated, you can start specifying the integrations between the forms on the website and the CRM. The integrations and the settings of the plug-in can be managed in the CRM-service section in WordPress.
Before adding any form integrations, you must first determine the general settings for the plug-in in Settings. The address of the CRM used in the integrations must be written in the API base URL field. The field API Key requires an API key, which you have to create for the plug-in in the CRM; the type of the key must be “WordPress-Forms-Plugin” (for more information about the API keys, see Web Service API keys). Lastly, you must also specify which WordPress forms are used in the integrations.
Adding a New Form Integration
You can create only one integration for each form – therefore the information provided in the form can only be used to create either a lead or a potential.
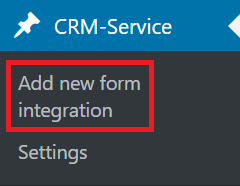
Creating a new integration is started by clicking Add new form integration button either inside the CRM-service section or in the menu (see the picture below).
There is an example on creating a new integration in the picture below. You must first provide a title (you can also leave the field empty, and then WordPress will generate a combination of numbers as the title). After this, you’ll need to select the form, whose answers will be transferred to CRM, in the field Form. In the CRM Module field, you can select whether the information is converted to a lead or a potential.
The view will update when you select a form, revealing the names of the fields in the form. You can then map these fields with a CRM field in the Module field column – the information obtained from the form will be saved in these fields. When you have determined all the needed settings, the integration is “published” with the Publish button. You can also save the integration as a draft.

If some information in the form is saved in a picklist (the Select type) in CRM, the values of the picklist are presented below the field (see the picture below). The information obtained from the form must be exactly in the same (written) format as the values of the picklist, so that the information can be saved in the CRM.

Format matters
If the information obtained from the form is in an invalid format (regarding the CRM field) or the CRM field has been deleted, the information in the form will not be saved in the CRM. It is recommended, that you plan the type and need of the fields carefully and that you don’t permanently delete the fields used in the integration (if you do not need to see the field in CRM, you can always hide the field).
If you have any problems with your form, check the answers carefully. In the forms, the answer consists of two parts: name and value. Names are there for guidance to the answerer, but the value is important when transferring data to CRM. For example, the answer names can be simple “Yes” and “No”, but in the system their values are 1 and 0.
Format of the date field is also important – no matter how you show the date question to the answerer, the answer value form sends must be in the format yyyy-mm-dd, so no yyyy/mm/dd, dd-mm-yyyy or other variants of the date format are allowed.
Debugging a WordPress form
If you find that no data is appearing in the CRM system via the form, but the data from the form is appearing in WordPress, test by creating a new form with one field (e.g. first name) and integrate it with the CRM system using the integration. If the data is transferred to the CRM system, the error is probably in the form itself and a new form needs to be created to correct it.
The WordPress plugin settings define the API key and the types of forms that can be integrated. So please check that these settings are correct. By going to the CRM system settings, you can see when there has been communication between the plugin and the system. This is indicated by the time stamp in the Last used column, which shows the time when the key was last used via the interface. If the API key has been used but the information does not appear in the CRM, the most likely fault is with the form and the fix may require the creation of a new form.